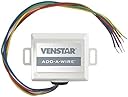
Venstar ACC0410 Add-A-Wire Kit
Product ID: 71140937
🔌Adds 1 wire virtually
⚙️Compatible with 6 Venstar thermostat lines
🛠️Easy install, no rewiring needed
Desertcart purchases this item on your behalf and handles shipping, customs, and support to Belgium.
⚡ Upgrade your HVAC wiring game without lifting a drill!
The Venstar ACC0410 Add-A-Wire Kit ingeniously adds an extra wire function to your thermostat wiring, enabling 5-wire thermostats to operate with only 4 wires or 5 wires to function like 6. Compatible with multiple Venstar thermostat models, it’s designed for 24V HVAC systems and ideal for retrofits, broken common wires, or adding cooling to heat-only setups. Installation is straightforward, saving costly rewiring and professional help, making it a must-have for modernizing older HVAC wiring with minimal effort.
| Customer Reviews | 4.5 out of 5 stars 1,098 Reviews |
J**.
Easy to install, though might require some minor technical knowledge from The Internets.
If you read this review and decide this product is not for you... that's reasonable. If you blindly order this product, never even try to install it, and then leave a negative review... that's profoundly unreasonable. I was almost dissuaded from this item based on a prior review - even though that review was beyond useless, the product is exactly what I needed, and I have never seen anything else like it. This product offers an ingenious solution for my problem (not enough wires from thermostat to HVAC system), it was easy to install (with some basic knowledge - I have no HVAC training beyond what I found on "The Google") and it works. 5 stars. As some background, let me say I'm not even a particularly good handyman... I have a drill and not much else for power tools. But to make up for any lack of knowledge/skill, I have an over abundance of confidence and access to the internet. You can decide if that makes me wise or a fool, and whether you trust this review. I am sure this installation carries risks I am not even aware of. You assume all risks and are responsible for any damage/injury/death/electrocution/fire/etc. To start, I was short on wires after I installed programmable thermostats. The original house wiring had 4 wires to the HVAC, which was sufficient for the original heating/ac thermostats since they were battery powered and didn't need HVAC power (they used: red wire for hot voltage, white wire for heater, yellow wire for cooling, and green wire for fan control). Unfortunately, programmable thermostats generally require external power (usually from the HVAC), meaning they need a 5th wire for ground. I tried switching the wiring at each season change (kept one wire for hot voltage, one wire for GROUND or common, one wire for fan, and then I would need to connect the last wire to either cooling or heating - but not both). This turned out to be a real PITA here in New England, where one day it's 90+ and I would have to rewire for AC and the next day its 50 or below and back I go to disconnect the AC and connect the furnace... This product is designed perfectly for the above scenario. It could also be used to bypass a broken wire or for certain other situations where you need one more wire. What you get is some passive element to combine two wires into one at the level of the thermostat, and then an adapter that installs at the air handler to separate the combined signal back onto two wires. My guess is that it is using voltage to multiplex the signals. For example 0 volts means both wires are off, 12 V means the fan wire should be on only, and the full 24V means both fan and AC wires should be on. Then the signals are demultiplexed at the air handler. That's a guess, but it makes sense to me. This assumption also explains the stated limitations... you can't use either the hot (red) or common lines for any combo - since they must always be fixed at 24 and 0 volts. Also, I suspect one of the combined wires will become unable to activate alone (not a problem if it's the AC wire, which you would always want running with the fan... but don't wire backwards so the fan can only run with the AC on...) As noted, there are some other limitations with this scenario, but fortunately for the 4 to 5 wire conversion you wouldn't notice (described below). If you are going from 2 to 3 wires the limits become more significant, see the documentation on the Venstar website for details. In my scenario, I combined the yellow (AC) and green (fan control) on one wire, thus allowing the thermostat to control everything with just 4 wires instead of 5. It works flawlessly. I can turn the fan on alone. I can turn the heat on alone (or with the fan). I can turn the AC+fac on. As noted, I don't think I can turn the AC on without the fan, but why would I want to? And the best part... NO REWIRING for heating or cooling!! So far, no bugs to report but it takes maybe 15 seconds for the furnace or AC to kick in when the thermostat triggers. I'm not sure if that was always the case, or if the add-a-wire somehow introduces some minor lag time. Now for installation. Be SURE that your system is 24VAC. I'm not sure if there are other voltages out there, but if this product works the way I suspect, it would probably fail spectacularly at any non-standard voltage. Tools required are screwdrivers (possibly including a jewelers screwdriver). You need to be able to open you air handler (in my case it's just two thumbscrews on a back panel of the furnace - though that did require fighting through some cobwebs and dust). You ALSO need to get behind the thermostat to the wiring (usually the thermostat face plate just comes off). Like I said, you have to install parts at both ends of the wire (duh...). The package comes with 2 wire nuts, which should be enough. Also, be sure you've turned off the furnace power when doing this... again, I'm not sure if 24VAC is really that dangerous but you certainly don't want to find out... The wiring is pretty straightforward from the instructions in the box (see the Venstar website for PDF). If you can't figure it out from the pictures, you probably shouldn't be messing with this. Installation took me an hour, but as I said above I'm really not much of a handyman. It took me 10 minutes to get the thermostat panel off the wall and another 10 minutes just to find the air handler... If I did this again I think I could do the whole thing in 10 minutes total. Make sure you know the wiring color codes, which are readily available on The Google... you don't want someone else to come along and accidentally find out you used yellow for 24VAC power. So in summary... it worked, it saved me a lot of pain and cost (of running more wire), and it was very easy to install with knowledge gained from The Internets. I suppose you could ding it for being expensive (the actual parts probably cost the company only a few bucks at most) - but it was well worth the price to me and there are no alternate products that do this, as far as I know.
C**S
No brainer, cheapest and easiest way to convert 4-wire to 5-wire HVAC.
My house was built before 5-wire was common, and therefore, I didn't have a C (common) wire to either of my thermostats; so - when I went to install smart thermostats I found that I'd either have to lose my independent fan control OR upgrade my wiring. My upstairs thermostat is almost directly underneath my attic air handler; so - I spent about $10 on wire, and a very aggravating 3 hours fishing new cable to the attic because of the convoluted cable path the installers took when running the original line. So - then I figured for the downstairs it would cost about $25 for more wire, and - an exponential amount of hours to replace THAT wire. That's where this product really shines - at the pricepoint, it's a no-brainer. It's cheaper than the 5-wire of any significant distance, and took me about 30 minutes to install while watching the how-to video (including swapping the themostat) downstairs. If you're comfortable replacing a thermostat, you can do this install - no problem. The documentation covers several frequently used HVAC configurations, and they have an /excellent/ and easy to follow video guide as well. The only concern I have is longevity - it certainly won't outlast an actual new copper wire run, but - for the immediate term, it works perfectly. The only thing I'd suggest is that they include a couple of self tapping sheet metal screws for mounting the controller in the air handler. Their instructions and videos mention this as the proper way to do the install, yet the screws are not included (by design, it says so in the manual - not included). I had some onhand, and they're pennies at the hardware store. Just include them. It's a minor complaint, for sure. Happy buyer, hope it lasts.
P**E
Works great!
I have a downstairs interior wall thermostat with the A/C - Heat air handler in the attic. I had a 4 wire thermostat installation with no C (power) wire. I wanted to install a Honeywell T5 Wifi thermostat that required the C wire for power. I had 4 wires in my thermostat but I needed 5 for the new thermostat. I thought my only option was to install new thermostat wire which was going to be a costly messy indevor if I decided to do it at all. I saw this and thought I'd give it a try. I installed this unit today, it took about 45 min to install the new thermostat and rewire the connections on the air handler circuit board in the attic. I watched the install video on YouTube and made step by step instruction list for both the thermostat connections and the air handler circuit board connections. My installation was exactly like the video right down to the color of the wires. Great easy to follow video by the way. After I connected everything up and turned the power back on I didn't have any power to the thermostat on the wall. I checked all the connections. On my air handler I ended up with 3 wires connected to the C terminal. I think when I tightened the connection one of the wires was not making good contact. I loosened the screw and adjusted the position of the wires and tightened it back up. Don't forget to put the cover back on your air handler before checking for power because there is usually a switch that removed power when the cover is removed. Anyway, after this slight adjustment I has power to the thermostat. I setup my thermostat and now everything is working perfectly. This thing is amazing. I think installing new thermostat wire would have been between $300 and $500 with holes needing to be cut in my walls followed by filling the holes and then paint. What a mess, I would not have done it if i had to do all that. This device is great, works as advertised. Highly recommened!
R**P
The worst part was enlarging the hole behind the thermostat
I used this in conjunction with a residential AC/Heat unit and the Honeywell RTH9580 series WIFI thermostat. Before install, there were 4 wires at the thermostat and a jumper installed at the unit. In that fashion, the system operated but the fan would not run independently which was a minor loss, but also, I was not taking full advantage of the features of the thermostat. I reviewed the Honeywell video and also watched the Venstar video. The install was fairly simple. The worst part was enlarging the hole behind the thermostat. (There is a wire nut, diode, and extra wire which need to hide somewhere.) After changing the wires at the unit, the fan turned on but there was no power to the thermostat. At this point, I decided to eliminate distractions so I locked the dog outside and turned off "My Friend Totoro" (I really didn't like the movie and it had absolutely nothing to do with John Turturro.) I moved an additional wire from GRN to COM and with three wires attached to that node. the system operated properly. The temperature is moderate today and I have the windows opened and am enjoying the 35% circulate feature on the Honeywell. If you think about the cost of the Honeywell (or the Nest), the cost of this solution is minimal.
J**U
Buy this product instead of re-wiring your home
I have an older home (built in 1988) and ordered new Wireless Honeywell thermostats (I have 3). When I received the new thermostats I pulled the old one apart to find that my house was wired for a 4 wire thermostat. Since the house is older it did not have the necessary wiring I found out the hard way - at the time of installation. I should have taken apart the old thermostat before ordering the new thermostats. Oh well, I tried the procedure in the Honeywell thermostat for not having a "C" wire and it did not work. I would have to give up either A/C or heat. And each change of seasons I would have to rewire the thermostat. I was about to return the new thermostats when I stumbled across this product. I read the other reviews - including the negative ones (which to me were not reflective of the product). I read the review that said this product was defective. I don't think it was defective since this produce is very simple as long as it is wired properly. I read the positive reviews and decided this was for me. I even took the advice to watch the company installation video. That is what really sold me. The video made it look so simple that anyone could do it. I watched that video many times over and over to make sure that I was doing it right. I had my tablet next to me during the installation to rewind and replay as necessary. I ordered one to try it out (being a skeptic). It arrived and the hardest part of the installation was really making room behind the thermostat to allow for the wire nut and diode. The units in the attic had a 'custom' wiring setup from the previous owners. There is a tray that collects water in the event of a leak and it had a float that cut off the unit if it filled up (even though there is a drain line). It was extra, extra insurance I guess. Having the float cutoff wired to the unit took up the "C" wire on the board. I watched the second video online that had a professional installer re-wire the device outside of the unit. I like this idea better since I didn't have to touch the circuit board. I had to install the Add-A-Wire in the splices that existed previously for the thermostat to unit (and float valve). This was not too difficult as long as you traced back the wire from the circuit board to be the same thing as installing on that terminal. So, long story getting longer. It worked flawlessly! I loved it enough that I promptly ordered 2 more for the other thermostats in the house. If you have a 4 wire thermostat house then you should get this product! It will save you tons of time and money trying to rewire the house with a new 5 wire (or more). I have no complaints and it is great. The thermostat works perfectly. Oh, one of the reviews talks about a short delay when the thermostat turns on the unit. Once my thermostat is in Auto how the heck can I tell if it is 15 seconds longer to turn on the A/C? I can't because I never stand at the thermostat and stare at it to make sure it is working properly. 5 stars for sure. Buy it and make sure to watch the videos.
F**N
It really works! You can now get that "C" wire you need without all the muss and fuss!!
I had purchased a Honeywell Wi-Fi thermostat for each of the two systems in our home, and was dismayed to find that although the first one installed very easily, because it was replacing a very similar Honeywell unit, installing the second one for our upstairs system was going to be more of a challenge since it had only 4 wires, and the new one required a 5th "C" (common) wire. In researching my options for ways to add the "C" wire I'd need, I came across an online review of this device, and thought I'd give it a go. Boy was THAT a happy decision! This thing actually does exactly what it's supposed to do! And it was very straightforward to install. I do recommend you look at the video on YouTube, since it actually gives you more detail than the instructions in the box. You can do it without the video, if you know how to read a wiring diagram, but the video makes the process a little more approachable. The current version can be found online. The most difficult thing in the whole installation was attaching the box to the inside of the furnace. I had a little trouble finding a safe place to mount it within reach of the wiring board. The leads provided are about 9" long, so you have to take that into account. Once you find a mounting point, the actual wiring installation takes about 5-10 minutes, depending on your skill and confidence level. You can do this if you aren't color-blind, and have even basic skills with a couple of hand tools. You'll need a couple of screwdrivers for the wiring terminals, and a drill/driver to mount the box inside the furnace compartment. Don't give up the convenience and savings of that fancy thermostat you've been eyeing just because you only have 4 wires. Give this thing a go, and you'll be in business in no time. Whatever magic is going on inside that little box works like a charm.
M**A
Solved my 5 wire to 6 wire problem perfectly. Fan control is back!
This is exactly what I was looking for. I recently had a new forced air HVAC system installed and decided to add a Nest Thermostat while I was at it. However, I got into a bit of a snag: I had 5 wires in the wall, and I would need 6 to take full advantage of all of my new system's features. Sure Nest says you can get away with out a Common... but there's tons of reviews all over the internet about how bad an idea it is to let the Nest do that. The installer of my HVAC system agreed, set the Nest up with the Common and instead left me without a fan wire and attached a fan switch in the garage... which made my wife and I unhappy as we loved to have standalone fan control with the old system. I read a bunch of stuff online and saw rumors that this thing does 5 to 6 as well, but there were no particular diagrams or explanations of exactly how that worked. 2 to 3? 3 to 4? 4 to 5? Sure. But no one showed 5 to 6. Well, it works. I bet it'd work just fine for 6 to 7 or whatever else if you have multiple stages that aren't being independently addressed or lost a fan as well. The colors of the wires in the wall don't matter. Just take a photo at both ends and make sure that no Rs or Cs are involved in the doubling-up you do with the Add-A-Wire Diode. R and C straight through then pick any two others and a wire color to use this with. Also, go watch Venstar's video on YouTube [...] before you do this to increase your confidence in your own ability to get it done. :) Anyway, here's the deal. If your system looks anything like mine and you want to turn 5 into 6, this should work perfectly for you as well. My system: - Bryant 314A furnace - 2 stages of heat (W1 and W2) - Bryant 126B air conditioner - 1 stage of cool (Y1) - Standalone Fan Control (G) - Power (R/Rh) - Common (C) - Nest Thermostat 3rd Generation My connections: Furnace <--------- Wall -----------> Nest ========================== R <----------Red Wire --------------> Rh C <--------- Blue Wire --------------> C W1 <------- Brown Wire -----------> W1 W2 <------- Green Wire ------------> W2 ***** Yellow Wire used for Add-A-Wire below **** ++++++++++++++++++++++++++++++ Furnace <--------> Add-A-Wire Module <----------- Wall ------------------------> Diode <-----------------> Nest ======================================================================== R <----------------------------Red C <-------------------------Brown Y1 <-----------------------Yellow G <-------------------------Green ................................Blue ----> Wire Nut <---- Yellow ----> Wire Nut <---- Blue .......................................................................................................Yellow -------------------> Y1 ........................................................................................................Green -------------------> G
C**E
Easy to install
Easy to install
Trustpilot
3 weeks ago
2 weeks ago