
🚀 Elevate Your RV Experience with Effortless Repairs!
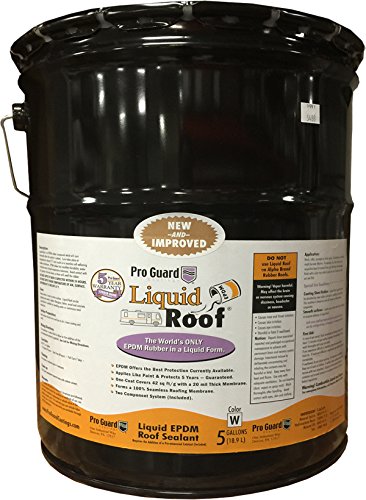
Pro Guard's RV Roof Repair Liquid EPDM Coatings in a 5-gallon pail offers a one-coat application that saves both time and money, ensuring your RV roof is protected against the elements with a reliable and durable solution.
| Manufacturer | Pro Guard |
| Part Number | F9991-5 |
| Item Weight | 50 pounds |
| Item model number | F9991-5 |
| Is Discontinued By Manufacturer | No |
| Item Package Quantity | 1 |
| Number Of Pieces | 1 |
| Batteries Included? | No |
| Batteries Required? | No |
M**K
Absolutely the best way to go!!!
Every RV roof eventually leaks. It's a UV thing. EPDM is pond-liner rubber. They've used pond-liner roof in Ireland for 50 years now and they're still fine. The WHITE EPDM material is less weather resistant (I hear) than the black. But, for an RV roof... this still gets you about 15 years. I've done two 32' RV roofs with this 5gal kit. I had about 1/2gal leftover each time.This EPDM stuff is great stuff... so long as you do the following:1) Clean clean clean clean clean. Get that sap and bird droppings off of there big time! Use starting fluid to get the sap off. Use the strongest detergent you can find along with a stout bristle brush to clean the roof stains (make a trip to a Janitorial Supply and ask for something serious... if the guy hands you Mr. Clean, do your business elsewhere).2) Scrap the old roof to bare wood wherever it's clearly cut or showing a problem. Scrape the wood and sand it down to assure a good surface. If it's a large void, get some fiberglass mesh from a body shop and when you lay the rubber, first coat the clean wood with a lot of EPDM, then lay the mesh on it and the goop the top of the mesh with more EPDM and smooth it out. It'll hold fine!3) To prep the RV for the coating, use the blue painter's tape (it's sunlight resistance and easy to remove). Using 18" wide painter's plastic or paper, tape along the roof's drip edge. Do this on a non-windy day and life is good. You'll waste your time if the wind kicks-up. BTW, leave the drip edge's seam exposed (where it screws onto the roof) so you can coat seam.4) Place a strip or two of tape at the front of the rig (passenger side to drivers side) about an inch past where the roof meets the fiberglass. Do the same in the rear. That will make the new roof coat look professional and minimize drips down the front of the RV.5) Buy a 12" tile-trowel with 3/16" teeth and a CHEAP 4" paint brush to spread the goop around. I found a trowel easier to use than a mop... though, a mop will work but you can't control the depth as well. You'll also want to buy a paint mixer: the kind that attaches to your drill so you can mix the activator into the goop. The stuff is too thick to do it by hand.6) Raise your TV antenna. No need to protect the air conditioners or even the skylights. Keep a bucket of water with a big sponge nearby cause you'll use it wash any drips off the side of the RV when you're done. You're now ready to apply.7) Again, on a NON-WINDY day, haul the EPDM to the roof. Start at the front: slop some out and spread it like hot peanut butter with the trowel. Don't be shy about making it THICK. The trowel's 3/16" teeth will assure uniformity of depth and the thicker you apply it the longer it'll last. It's self leveling (within reason!) unless you go back 5 minutes later and re-coat. So, don't re-coat. Do it thick and move-on. Work your way side-to-side down the length of the RV to the rear and down the ladder for the last few square feet. Total time to apply the goop on a 32' RV is likely 40 minutes. Be sure to have coated the rain gutter seam and slopped some under the air conditioners and onto any patch or protrusions where rain might find passage: those places is where the 4" brush comes in.8) Remove the tape immediately (you do NOT want that EPDM to dry or tack-up on it!!). Pulling the tape will cause the tape to inevitably flutter down and touch the RV's sides... expect plenty of drips on the side... they are NOT a problem. So, now take the sponge and wipe them off. They come right off cause the EPDM product is water based.9) Now wash your paint mixer and trowel... or you'll NEVER get the EPDM off it. Throw-away the 4" brush.10) You're done.Don't fall to temptation and walk on the roof for a few days. The stuff ONLY cures at +70F. But it's waterproof even at lower temps (it just isn't hard yet). You'll know its cured when it got a hard somewhat plastic-like shell to it.The liquid white-EPDM is reasonably as strong and protective as a solid sheet of black pond-liner material and about $2,500 less. It's goof proof and your only concern is whether you have the will power to REALLY clean that roof. Application is easy. BTW, like pond-liner, the stuff is fairly forgiving of uncleaned spots on the roof so, within reason... clean it good. You'll have a nice shiny thick rubber roof that (looks to me like) will last 15 years... maybe more.
D**E
May seem pricey but it's a quality product.
As others have stated, it’s pricey but a lot cheaper than a full roof replacement.I have a twenty-year-old 21’ C class RV which I bought for $7,000. It’s not pretty but everything works, and it’s the perfect size for one or two people to go desert camping in. However, the roof was leaking over the cabover. So when it rains, it all pees down onto the bed. Not good. I looked into replacing the roof and I was quoted $2600, which just doesn’t make sense on a $7,000 RV.So $350 seems quite cheap in comparison and I decided to roll the dice with the magic goo. When the can arrives, there’s no sign of the catalyst. Don’t freak. When you pry the lid open, there’s a plastic recessed bowl, and sitting in the bowl is a ~ 1 quart bottle with the catalyst. When you pry the plastic bowl out, then you get to the goo.I bought an empty 1-gallon paint can from Home Depot and mixed the stuff in 1-gallon batches. I marked with a Sharpie the length of the catalyst in the bottle into fifths and just glugged in enough of the catalyst to get down to the next line. That seems to have worked ok. I know they said to use a corded drill, but my 18v Bosch had no trouble with the paddle mixer when mixing 1 gallon batches.Some notes:* I scrubbed my roof thoroughly with Simple Green, as recommended, and let it dry during the afternoon and overnight. That seemed to work well.* The stuff goes on surprisingly easily. You just pour a little bit onto the roof, it will form a thick puddle, and you then spread it out. As recommended, I ended up buying a 3” nap roller and a cheap squeegie, and ended up not using the roller much. Because my RV is small, and the surface is broken up with a rooftop AC, a big storage bin, vents, and other stuff, it really didn’t make sense to spread the stuff standing up, so I skipped the roller and found the squeegee easier to use. If you’re doing a big 40 foot diesel pusher, you may have a different experience than I did.* I would recommend using two squeegies. Leave one at regulation width, and lop the ends off the other one to make a narrower 3-inch-ish squeegie for tight corners and detail work.* The goo has the consistency of really, really thick latex paint. It spreads easily but sticks to everything. When pouring from the can, the side of the can will get messy, and wherever you set the can down will end up with a little puddle of goo. I would recommend having something to set the paint can down on between pouring sessions.* Because the side of the can is now covered in goo, subsequent mixings in the same can will make things progressively messier. In retrospect I should have bought a bunch of cans, and thrown them out after one use. In fact, you’re going to end up throwing everything out at the end of this, so don’t use or wear anything you’re terribly attached to.* I did my roof in two passes - covering the main areas in one go, waiting a week for it to cure, and then going back and doing detail work later. I would recommend not doing that. Do it all in one pass. The second application looks pretty obvious. I’m not that concerned about the appearance of my roof, and I’m sure it will maintain a seal, but I think you’ll wind up with a classier looking job if you do it all in one pass, starting from one end and working your way to the other.* In all, my 21-footer only required about 3.5 gallons of the stuff, but as I mentioned, I have a rooftop AC and a large cargo box.* Use masking tape to mask around the AC, TV antenna, and whatever other random stuff is up there. Also mask all around the edges. When you peel the masking tape away a day or two later, you’ll get a nice clean edge.* If you’re using your RV’s ladder to go up and down, I recommend masking that off as well. It’s very easy to get the goo on your gloves or shoes, and you’ll end up tracking it onto the ladder, and it doesn’t clean up very well. I think you’re better off protecting the ladder, or using a work ladder, than trying to clean your nice shiny chrome ladder after the fact.* My roof is bubbling in places, and all the reviews and documentation say that’s normal and the bubbles will subside over the course of a few weeks. In a few months I guess I’ll have to report back in. It also hasn’t rained yet, so I’m curious to see how well it holds. But it looks fantastic and I have every reason to believe it’s going to form a nice watertight seal.
F**X
Worked Well
I bought this and the one gallon kit. I could have managed with the 5 gallons, but, the experience of working with the one gallon kit first provided a good learning experience. I coated the edges and under the vents, AC, etc. with the one gallon kit and followed up two days later with coating the whole roof. I used a smooth roller on a curved/convex roof. I was concerned that the products self-leveling characteristics might run to the edges, but, the product sets up well and allowed ample working time at 85 degrees. Just in case, I mixed two gallons, applied that, and finished with another two gallons. This was my first time using this type of product.
C**E
Good product!
First thing you should be aware of, is that this sets up quickly. My husband started it early in the morning once the dew was off the motorhome. It was really hot that day and after applying, it started to bubble up on him! He had only mixed up half of it for otherwise the entire bucket would have been ruined and it isn't cheap by any means! Picking another day when it was cooler, I helped him as well to speed up the process and it went on beautifully, covering everything and looked great when finished. We have a 36 foot motorhome so half a bucket would have been enough and because of what had happened previously, was thankful that we were able to do it with what was left! Goes on really thick and covers well. I was very pleased with the results but pick a day when it is not too hot!
Trustpilot
1 month ago
2 weeks ago
