Buy anything from 5,000+ international stores. One checkout price. No surprise fees. Join 2M+ shoppers on Desertcart.
Desertcart purchases this item on your behalf and handles shipping, customs, and support to Belgium.
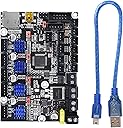
⚡ Upgrade your Ender 3 to stealth mode with BIGTREETECH’s silent powerhouse!
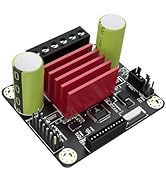
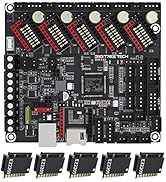
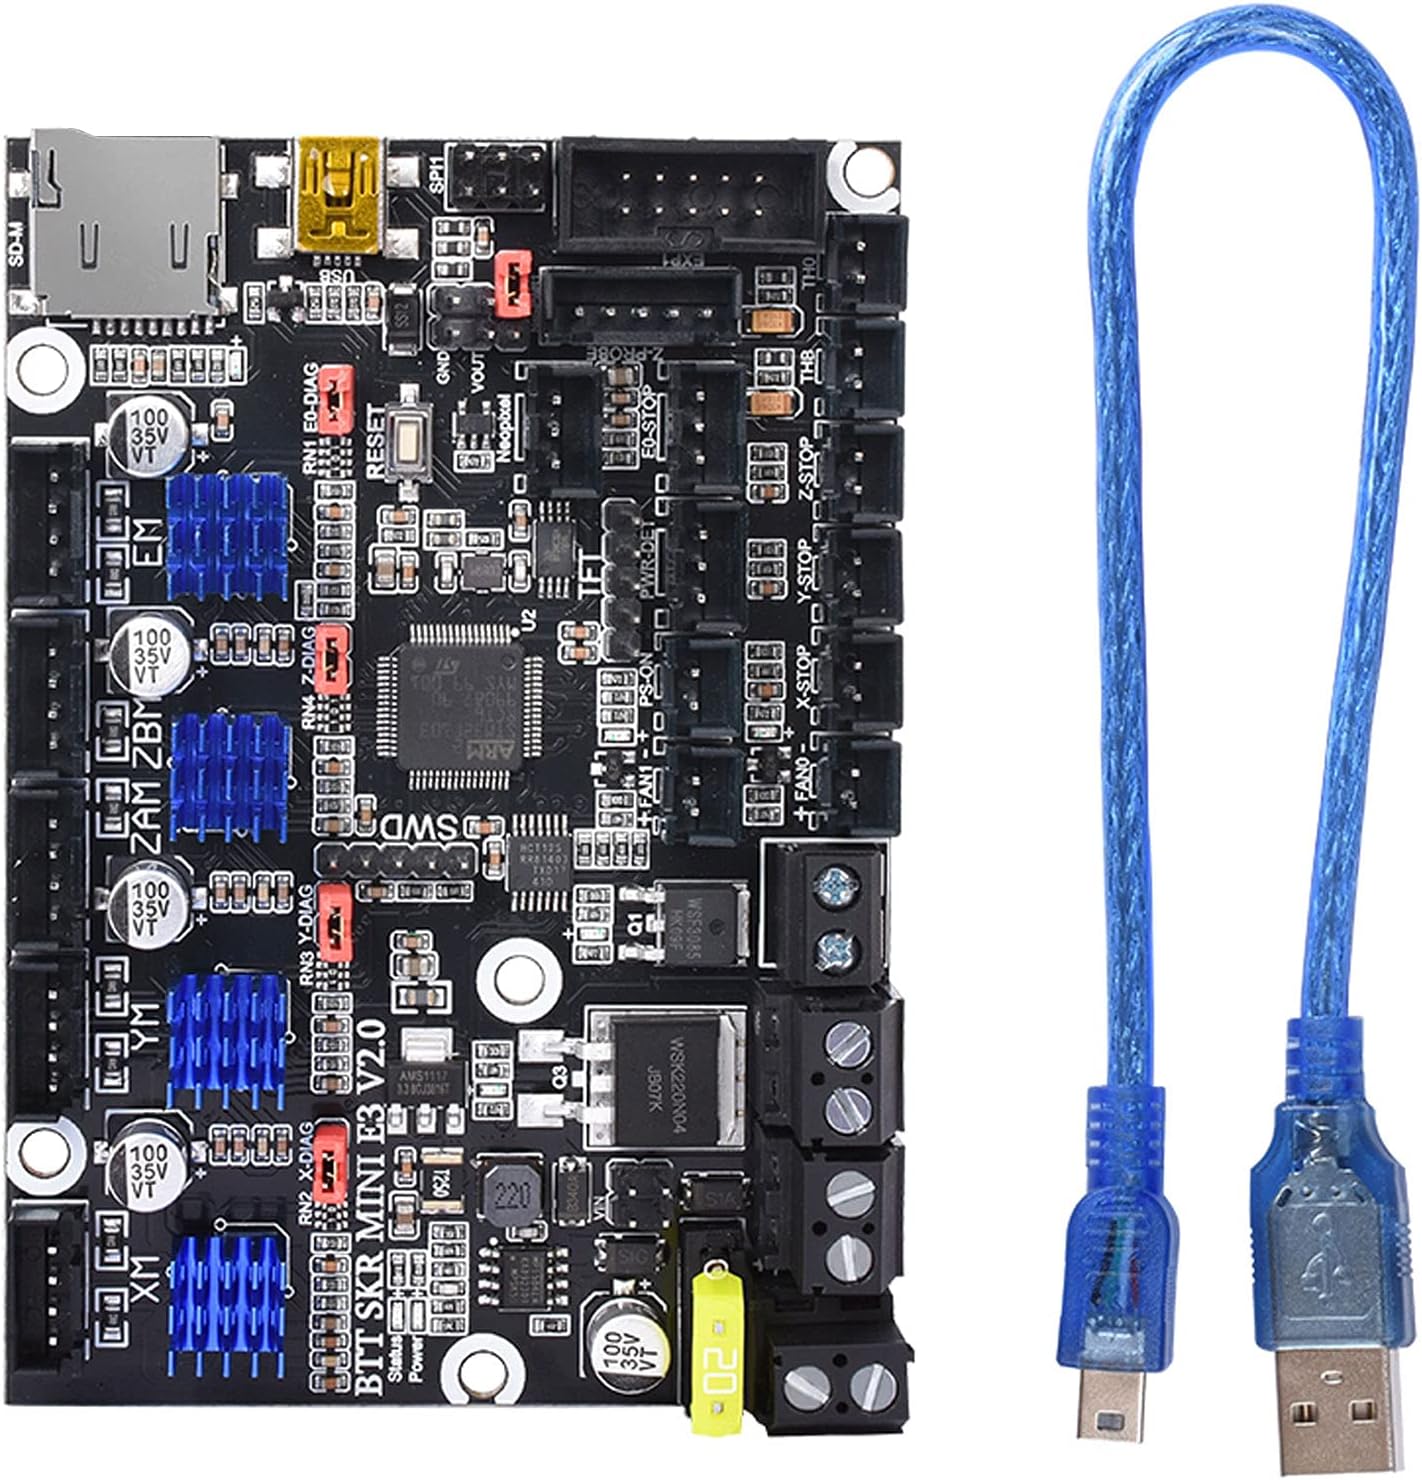
The BIGTREETECH SKR Mini E3 V2.0 is a 32-bit control board designed as a direct upgrade for Ender 3 series 3D printers. Featuring TMC2209 UART stepper drivers, it delivers ultra-quiet operation and enhanced precision. The board supports BLTouch auto bed leveling, filament detection, power-loss resume, and improved thermal management with a low-resistance MOSFET. Firmware updates are simplified via SD card, making it ideal for makers seeking advanced customization and reliable performance.


| ASIN | B0882QGFZR |
| Brand | BIGTREETECH |
| Brand Name | BIGTREETECH |
| Color | black |
| Customer Reviews | 4.5 out of 5 stars 1,258 Reviews |
| Display Type | LCD |
| Global Trade Identification Number | 00778416923359 |
| Included Components | BIGTREETECH SKR Mini E3 V2.0 Control Board |
| Manufacturer | BIGTREETECH |
| Model | 1 |
| Part Number | KINGPRINT-ZZB000412 |
| Smart Home Compatibility | Not Smart Home Compatible |
| UPC | 778416923359 |
| Unit Count | 1.0 Count |
| Voltage | 3.3 Volts, 5 Volts |
M**9
Stealthchop is Magic, Silence is Golden
I got the SKR Mini E3 V2.0. At first, I was going to add a boot loader to the Creality stock board to add additional Marlin firmware features. Why bother? The SKR Mini E3 has all of that and is a really nice drop-in replacement for the Ender 3 Pro. It works well out of the box, but I ended up compiling the latest Marlin 2.0.6 firmware anyway. The boot loader makes it easy, just add firmware.bin to a flash card, insert and turn on the printer. The firmware loads in 10 seconds. Included is a 128 MB flash card that I use for this firmware.bin and nothing else. Compiling the firmware.bin with VSCode/PlatformIO requires watching Teaching Tech's youtube video. The attached pictures are from Teaching Tech and they helped me with the install wiring from old board to new. I am also using this new board with the stock Ender 3 display. No issues there and the original display works well with Marlin. Once you get this running, you will rejoice at how quiet the stepper motors are. The TMC 2209 drivers have everything to do with this. This is a great option to upgrade the motherboard and the price is better than the Creality Silent Board. A few of the options are moved around in Marlin firmware, like AutoHome and Preheat PLA, but once you find them, it is easy to work with. I love the mesh bed leveling feature where the firmware takes you to 9 different points on the bed, keeping the steppers locked, while using the display dial to control the Z motor axis to make tiny adjustments. Just keep the sheet of paper under the nozzle and feel away. Manual bed leveling was never this easy. The processor then auto-corrects for bed imperfections to get the best bed adhesion. Make sure that your Start GCode includes M420 S1 after G28 (G28 disables the mesh). I am using a borosilicate glass bed and there are indeed slight imperfections that this can accommodate for. This SKR Mini E3 V2.0 board rocks.
B**S
A little work but big payoff
Rewarding for more advanced users willing to take the time to compile Marlin 2.0 bugfix firmware and work through configuring bltouch etc. Probably frustrating for everyone else! I received version 1.3 hardware and it's working (almost) flawlessly, expect to work out the few remaining quirks soon. Huge improvement over the 8 bit MKS Gen board. So silent.. love the auto leveling also and bltouch probe z homing. Wasn't meant for my adimlab printer, but worth the effort and all the stuff I learned installing it. Took a little while to find info on hooking up the reprap discount screen, also made by bigtreetech, so it's funny there wasn't a straight forward connection or adapter. I also bought a TFT35 version 2 by mistake where version 3 is latest and has the knob, but after finding and updating the TFT35 firmware I don't miss the knob and may disconnect the other screen entirely. Only concern that comes to mind is the firmware must be flashed from SD card not USB. This is kind of annoying and haven't researched it it's possible to use a different bootloader or not. Also there is only one extruder output, and only one z motor connection. For hardware version 2 you get an additional z connector but it shares a driver, so it's the same as a Y cable essentially. I'm running dual z motors connected to one cable and it's fine.
J**L
Excellent out of the box
This board is silent, just like the Creality 4.x mainboard, but it has some extras on it, such as dedicated ABL port, dual Z axis ports, and uses a Micro-USB port that is easier to find than the Mini-USB that Creality uses. Marlin firmware compilation was more involved than with the Creality board, and it took me a couple of tries to get everything configured properly. The dual Z-axis ports are driven by one driver, so they are just a dual output, not independently adjustable, which is great for dual z users who have their machine frame dialed in well. The package includes heatsinks for the drivers which will need to be installed (simple peel and stick). The board itself has some massive heat dissipation pads built in as well, so I feel the driver chips will stay well inside their optimal temperature range. This board allows for stall zeroing, which I opted not to use (I prefer having my end stop switches). This board is silent, so the steppers no longer sing their tell-tale song while printing. I don't notice any improvement in print quality, but I didn't lose any quality either. I have tried both the Creality silent board and this board, and this board is my preference as it seems to be designed with expansion in mind, where the Creality offering doesn't give much expansion room. The firmware that this board comes packaged with is good enough to get you printing, and printing well, but you will need to compile a firmware that will contain your preferred options!
J**R
Good upgrade for CR-10
This board was a great upgrade for my stock CR-10s. The board itself is small, and it took some time but installing it was simple, just make sure you cable manage. The board allows for my stepper motors to be even quieter and accurate to 0.25 mm.
C**.
Wow - what a difference
I ordered this after seeing a Teaching Tech review on YouTube. I figured it would help me produce some better prints, but holy cow... I had no idea the difference this would make. I have an Ender 3 pro. Noise: Honestly, this is reason enough to get this board. The rest of the benefits are great, but from a noise perspective alone, this was worth the cost. My printer has gone from sounding like an old matrix printer to being virtually silent. No joke - the fans are now the loudest part and I can't hear it printing when sitting 5 ft away. Print Quality: Everything is smoother. Going to 32bit was a big improvement for when I'm printing anything with a curve. Expandability: I haven't installed the other upgrades to this board yet, but I did take a quick look and it's basically plug and play now. Should be very easy. NOTE: This board has dual Z slots, so if you have an Ender 3, make sure you plug the wires into the correct slots (they are labelled). I had an issue with my machine not responding correctly because I plugged my X into the second Z by accident - thinking it would be the same as the board I started on.
K**R
Must have upgrade, but the instructions suck integrating with BLTouch
Bought this and the BLTouch to upgrade my Ender-3. Overall, the upgrade was very much worth the effort but be aware there's an undocumented step. Board installation was fast and (relatively) painless. Creality hot snots the plugs into the connector, so I spend more time pulling the glue off then actually cabling the board. Once the board was installed I loaded the default firmware from the bigtreetech github and ran a test print, the difference in sound from the motors was incredible. I then attempted to install the BLTouch. Installation was as simple, my problem was with the board firmware. The BLTouch has an offset from the print surface that you have to account for. After you flash the firmware for the BLTouch from the bigtreetech github, you have an option to set the z-axis offset. The way you do this is to z-axis home the printer, place a piece of paper on the print surface, then move the print head down until you feel friction sliding the paper back and forth (similar to bed leveling). Once you feel the friction, note the z-axis position number on the controller and set that in the z-axis offset. Save changes and you're supposed to be good to go. The offset is typically going to be a negative number, since the print head is still above the bed at 0.00 position. The default firmware for the board is configured to not allow you to set a negative position when manually moving an axis. You either need to compile your own firmware with the software end limits disabled or create a gcode file with the following line: m211 s0 Save that an SD card and print it, that will disable the software end limits temporarily. find your offset, set it, save the configuration and reboot the printer. At that point you're good to go. Once I did that, I completed a final manual bed leveling (you want your bed close to level for BLTouch), had it auto-level and ran a print. No issues with that print and I'm about to finish up a 24-hour print job that looks amazing. Pain in the butt to get BLTouch to work with the board, but worth it in the end. Highly recommend the board.
J**Y
Resurrected my Ender 3 Pro
I was able to use this to resurrect my ender 3 pro. It connected right up without issue and the pre-installed firmware worked perfectly. I was able to get things dialed in and get it back to printing rather quickly.
I**.
All Smoke and Mirrors. Zero Support.
Stay away! Unless you're very familiar with compiling Marlin and PCB board diagnosis, this is not for you. BigTreeTech offers ZERO support.....NONE. Instead, BTT relies on Github and facebook group members to be their customer support. Go join one of the BTT facebook groups and see how many people with issues are getting no help OR when help is provided, it's by a fellow member but never from BTT. Same thing, go to the BTT Github page and look under the "issues" tab, you'll see the same thing. Currently, their firmware version on Github hasn't been compiled correctly causing issues and BTT doesn't seem to care to fix it. Meanwhile, people are having all sorts for board issues related to hardware. I understand that Youtubers like Chep and TeachingTech use and recommend these boards but they get direct support from BTT and in some cases (TeachingTech) they get paid for reviews. You can do what you'd like but if you are the type of person that is still at the point in this hobby that you need help, this isn't the board for you. Is the board silent? Yes but so is any other board that configured the same way. I expect to send my board back due to hardware and software issues.
E**E
Presque envie d'en acheter une autre sans raison
Pas besoin de faire de manip pour charger un nouveau logiciel ou autre. Ca marche une fois branché. Pour le bruit, c'est incroyablement efficace : je n'entend plus que les ventilateurs que j'ai pourtant remplacé par des silencieux. Mon imprimante est maintenant aussi bruyante que mon PC. Le seul inconvénient étant sur l'EEPROM (je pose le terme pour ceux qui veulent se pencher sur la question). Il s'agit de l'endroit où les informations de paramétrage utilisateur sont stockés, comme le calibrage de la position des moteurs, les températures de préchauffage, etc. Avec cette carte mère, cet espace n'existe simplement pas donc les paramètres sont à refaire à chaque démarrage OU en créant une version modifier du micro-logiciel de la carte. Il y a pas mal de tuto et de documentation, ce n'est pas difficile et ne requiert pas de matériel supplémentaire, mais il faut de la patience et c'est pas mon cas. Je me suis donc tourné vers le système D : - le réglage du plateau pour être centré peut se faire en décalant les interrupteurs de fin de course des moteurs plutôt qu'en donnant un "offset" à l'imprimante. - Il est également possible de modifier un peu les caractéristiques de l'imprimante dans le slicer (cura, prusa slicer, etc). En y renseignant la taille de mon plateau en y ajoutant le décalage de la buse, le problème est réglé. - Idem pour les températures, je la change dans le slicer et ca marche comme je le souhaite.
N**3
Ideal Upgrade
I bought an Ender 3 Pro last December and I've spent a bit of money and time on various upgrades. The last real upgrade I wanted was the motherboard, as I understood that the 1.2 version of this board was far superior to the stock board. Luckily this 2.0 version was released before I got round to purchasing the board so I took the chance even though it was quite a bit more expensive. The swap over took about half an hour (I took my time and took photos of the wiring before unplugging everything) and it was relatively easy even for me - I'm not the most techinically minded chap if I'm being honest. Wow what a difference. The stepper motors are ridiculously quiet - literally the only noise you can hear is the fans. Time will tell if it improves print quality for me - my machine is dialled in and prints well anyway, however I have seen others mention it does improve aspects of the print. There are a ton more options and the menus are blazingly quick. I'm not going to make use of the BLTouch functionality as I have no issues levelling with paper (good springs!) but it's nice to know I have the option. My printer is probably as good as it's going to get, and I feel this was very much worth the money. Finally, if you're worried about having to mess about with firmware and compiling and the like - don't be. It's literally plug and play - unless you want the BL touch. If that's the case there is a lot of help out there.
J**R
Super leise, für super Preis. (und easy plug and play)
Dank diesem Board: Das lauteste an meinem momentanen Build ist wirklich nur noch der Hotend Lüfter. Easy Plug and play mit Ender 3 / Ender 3 pro. Es ist ein wenig knifflig wenn man noch nie ein Board gewechselt hat, aber bei der Gelegenheit kann man auch gleich die Kabel enden krempen. (sehr empfehlenswert da die gelöteten Enden nicht geschraubt werden sollten) Die aktuelle Marlin Version ist schon drauf also reinbauen und los geht's. Nicht nur sind hier die Stepper leiser, sonder auch wichtige teile wie die "haupt" Sicherung besser und der Bed heating mosfet ist viel größer und somit auch kühler. Für den Preis einfach das beste Upgrade für jeden Standard Ender drucker. Muss jedoch noch sehen ob die Prints auch gut raus kommen wie vorher.
J**C
Breathed new life in my old Prusa clone
I used this to replace the dead 8-bit board of my old Prusa clone (HicTop 12) Note: You need to really know what you are doing, and have to be comfortable to crimp and solder your own cables if not using this for an Ender! Was overall very easy for me to install in my Prusa clone. The new drivers are amazing! Compared to the super old drivers from the old 8 Bit board these are virtually noiseless. I can actually sit in the same room and work when the printer is printing. Overall very positively surprised that the swap out went so smoothly. I cannot say anything about the MOSFET quality as I am using two separate big ones for bed and hot-end use. So no experiences using the on-board ones. Tip: Use separate big MOSFETs, they come cheap (2 pack for way below $30) and usually ready to use, with cable clamps etc., they reduce any heating issues, reduce fire issues and take any heat/power strain off the board. Bought mine on Amazon years ago, never regretted it. Pros: 1. Very compact design, in fact it is truly "mini" 2. Excellent drivers, make a noisy printer virtually silent, cooler included 3. Marlin 2.0 shines on this board 4. Works exceptionally well with my Orion Piezo auto leveller, I now get the bed perfectly levelled with 9-point in less than a minute. Every print's first layer is now pure art 5. Board build quality and online documentation ranges from very good to absolutely sufficient for such a competitively priced board. 6. Noticeably better performance with this 32-bit board. 7. Super easy to flash the firmware updates 8. Lots of people own this and there is quite a lot to google out there if you ever get stuck. Did not have to use their customer service once. Cons: 1. You should really be comfortable with configuring Marlin, soldering, cable crimping, etc. if you do not do a direct Ender board update but use this for a different printer. Because you will have to make at least some new cables and connectors. 2. Patience is necessary, as a move to a new board is never trivial, lots of fun (?) testing is necessary 3. Had to buy the Color TFT E3 V 2.0 from BT as well, as my old screen would just not work with the board, but, to be honest, totally worth the investment, as the TFT not only is a touch-screen but a very powerful mini Octoprint as well, among other things it has a rather useable terminal built-in. No more running back and forth between the computer with Octoprint and the printer.
O**N
Yazılım ve teknik destek
teknik desteğin olduğunu söylemiştiniz ender 3 v2 ve btt skr mini e3 v2 için yazılım desteği istiyorum onun haricinde ürün süper
Trustpilot
1 day ago
1 month ago