Buy anything from 5,000+ international stores. One checkout price. No surprise fees. Join 2M+ shoppers on Desertcart.
Desertcart purchases this item on your behalf and handles shipping, customs, and support to Belgium.
๐ฏ Upgrade your control panel game with precision and style!
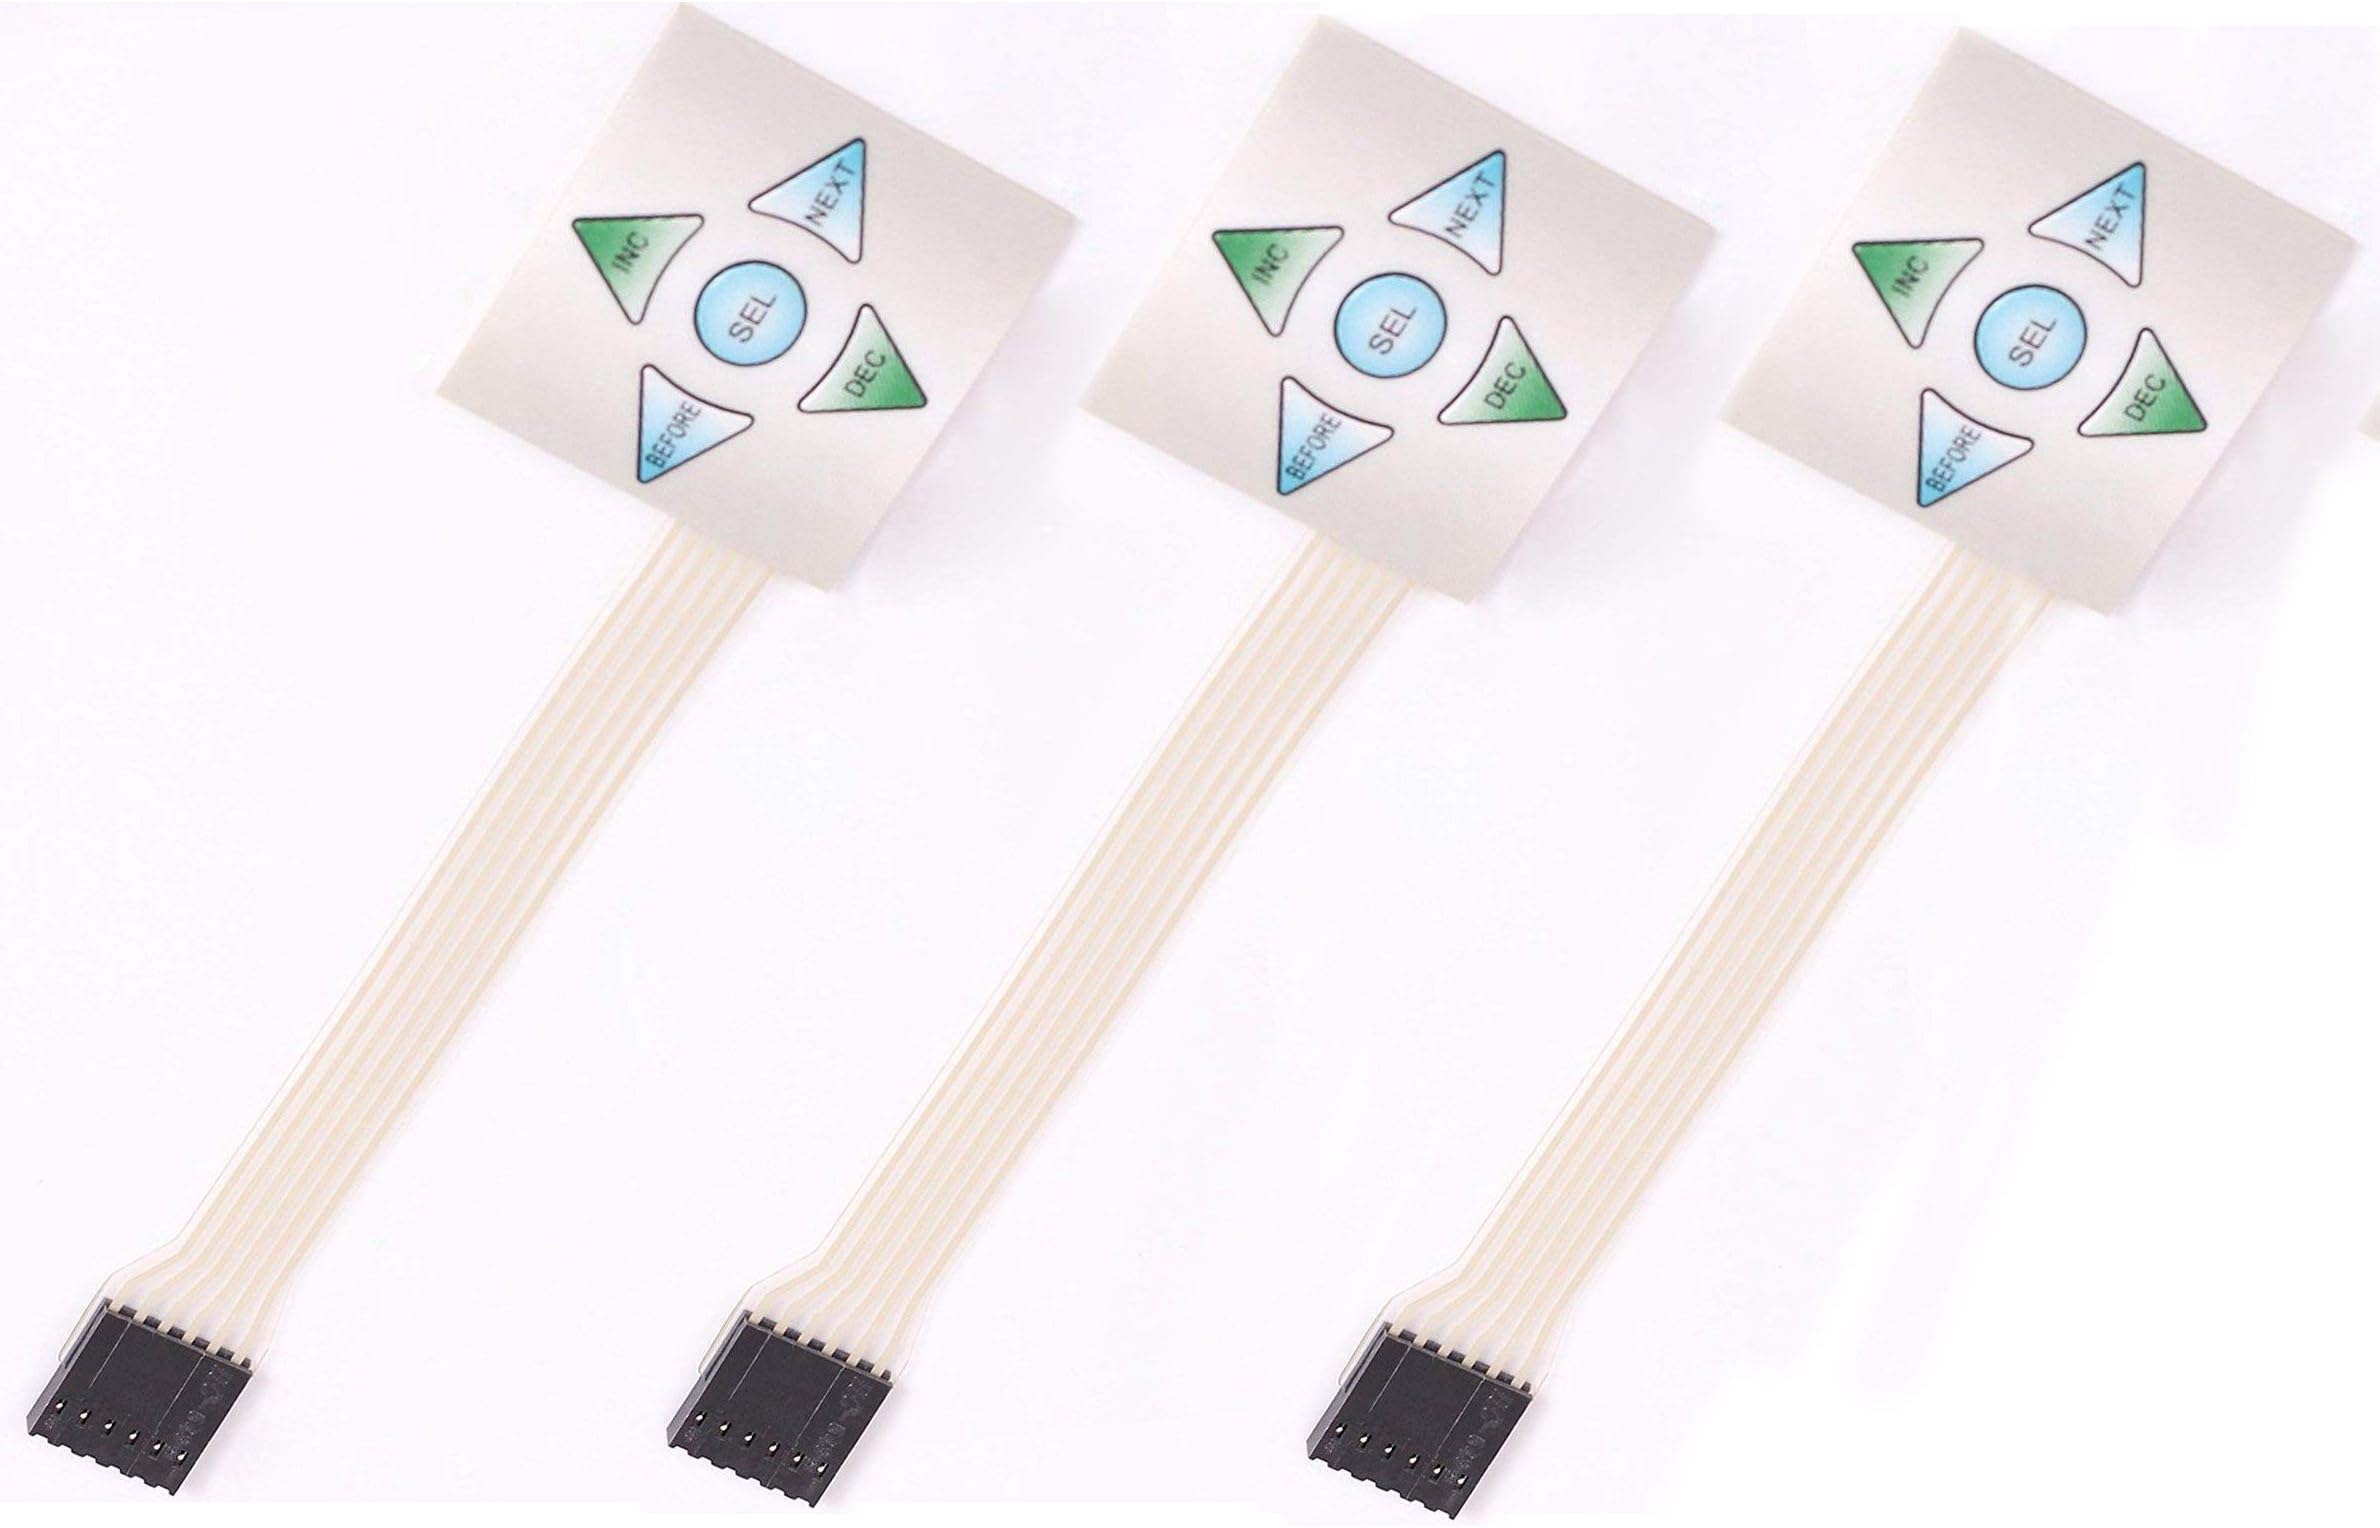
The YXQ 1x5 Membrane Switch Keypad is a compact, 5-key control panel designed for industrial and home electronics. Featuring a 12V DC operating voltage, 6-pin 2.54mm pitch connector, and tactile membrane switches with 250-350g actuation force, it offers reliable performance and easy adhesive mounting. Sold in a cost-effective 3-pack, itโs a smart replacement for expensive custom keypads.
| ASIN | B071LMK35L |
| Additional Features | Adhesive Mountable, Modern Design, Video Game Theme |
| Antenna Location | Office |
| Best Sellers Rank | #116 in Numeric Keypads #2,005 in Computer Keyboards |
| Brand | YXQ |
| Built-In Media | [3 x Membrane Switch] |
| Button Quantity | 5 |
| Color | 5 keys White |
| Compatible Devices | Keyboard |
| Connectivity Technology | PS/2 |
| Customer Reviews | 4.3 out of 5 stars 52 Reviews |
| Enclosure Material | Plastic |
| Hand Orientation | Ambidextrous |
| Keyboard Description | Membrane |
| Keyboard Layout | QWERTY |
| Manufacturer | YXQ |
| Mfr Part Number | MT0523001 |
| Model Name | MT0523001 |
| Model Number | MT0523001 |
| Number of Keys | 5 |
| Number of Sections | 1 |
| Power Source | Wired |
| Processor Count | 1 |
| Recommended Uses For Product | Office |
| Special Feature | Adhesive Mountable, Modern Design, Video Game Theme |
| Style Name | Contemporary |
| Switch Type | Membrane |
| Theme | Video Game |
| UPC | 712755500840 |
| Unit Count | 3.0 Count |
| Water Resistance Level | Not Water Resistant |
G**R
Great little touch pad
Using for an Arduino project and one side of the pin is ground and then use ohm meter to confirm the pin assignment as a quick tip. check the two outer pins with one of the outer buttons to get a start, move one button in and figure out which one is ground vs the next pin. With the ribbon facing you left being the batt type and right being start the top wire is ground. Wire one down from top is the Start button Middle wire is the + 2nd from bottom is - bottom wire is Batt Type or stop looking icon Once I figured out the pin out the rest was easy using pinMode(ThePlusButton, INPUT_PULLUP); to use the internal arduino uno/nano... resistor. PlusButtonState == LOW when you press the button Other then that basic code understanding you should be in business. I haven't tried the adhesive yet, but if I run into any problems I will update this review. So far nearing the end of the proto phase and will be on a boat using this so will have some weather on the button. with the ribbon running into a sealed box thru a small cut out with silicone or other sealant that wont eat away the protective ribbon.
A**E
Great for quickly adding a few buttons to a Raspberry Pi or Arduino project
These little buttons are great for quickly adding buttons to electronics projects. They are momentary push on membrane buttons with an adhesive backing. Can be made to look nice by cutting a slot for the ribbon cable in your enclosure ~5mm inside the footprint of the switches on the ribbon side. (The ribbon does not come out of the edge, it comes out slightly in and there is adhesive on both sides. This allows the cable to be completely hidden.) All in all, these work well, look nice, and save a ton of time. Bottom line, this is a 5 star product and I always keep some of them in my rapid prototyping kit.
S**N
Could be better
Wish there was a 'blanket version offered. Bought 2 packs as needed to try and disassemble to make custom top layer. Added own top layer, and discovered other portions of button tops increased in height when 1 was pressed. So, there appears to be some sort of (not viewable) communication between button cells. This is good thing. Buttons are not fully sealed because of this and area around cable connection does not appear to seal well. That being said, I may have disturbed seal while removing top layer, so not pronouncing as bad product. Connector quality is iffy, already found 1 that has Intermittent contact to middle SEL button. Looks like fingers slightly misshapen. Recoverable, but shouldn't have to.
E**.
Great Product
I bought these small switches to put in my retro arcade machines so my friends can easily add credits to the video games. These work really well for retro arcade machine credits. Very robust and well made product. I have been using these for years and no failures. I highly recommend this item.
M**R
Cheap replacement for expensive keyboard
I used this to replace a 5 button key membrane and it works perfectly. Tested after install and just kept a note with how the buttons correspond with my machine. Manufacture wanted 200+ for their custom keyboard membrane . These worked fine at under 10 for a 3 pack
G**G
Works well!
Used these on a small project - have not had issues with contacts. Does the job!
F**R
Switches don't work
I got three of these in a package. On 2 of them only sw1 & sw2 worked. On the third one all 4 of the switches worked originally but sw4 quit working after about half a dozen presses. so, I cannot use any of them.
R**R
No Pinout - don't want to get my multimeter out
Would be nice if there was a Pinout on at least the listing I'll have to go get my multimeter out not the end of the world but a little frustrating when I'm in the middle of a coding storm. Works awesome as a direct connect for Arduino though, just with there was pin designations anywhere. Reducing this from 3 to 2 stars for doing your job for you here's the Pinout: From bottom up facing you the ribbon pins are as follows: Bottom: voltage in 2nd from bottom: Select 3rd from bottom: Dec button 4th from bottom: Inc button 5th from bottom: Before button 6th from bottom(top of ribbon): Next button
Trustpilot
2 months ago
3 weeks ago