
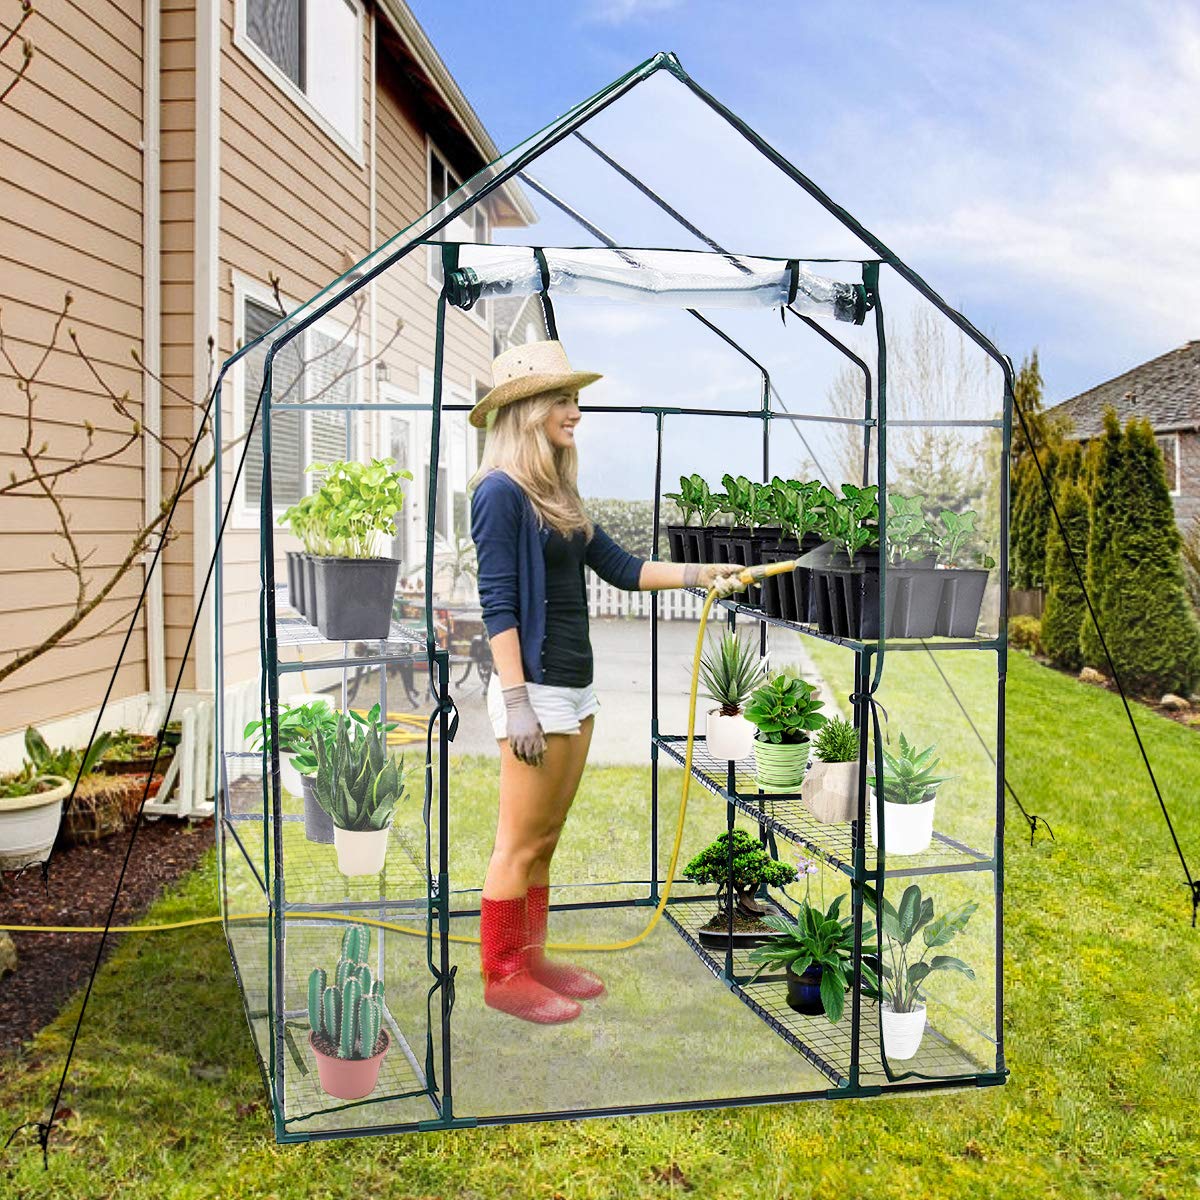
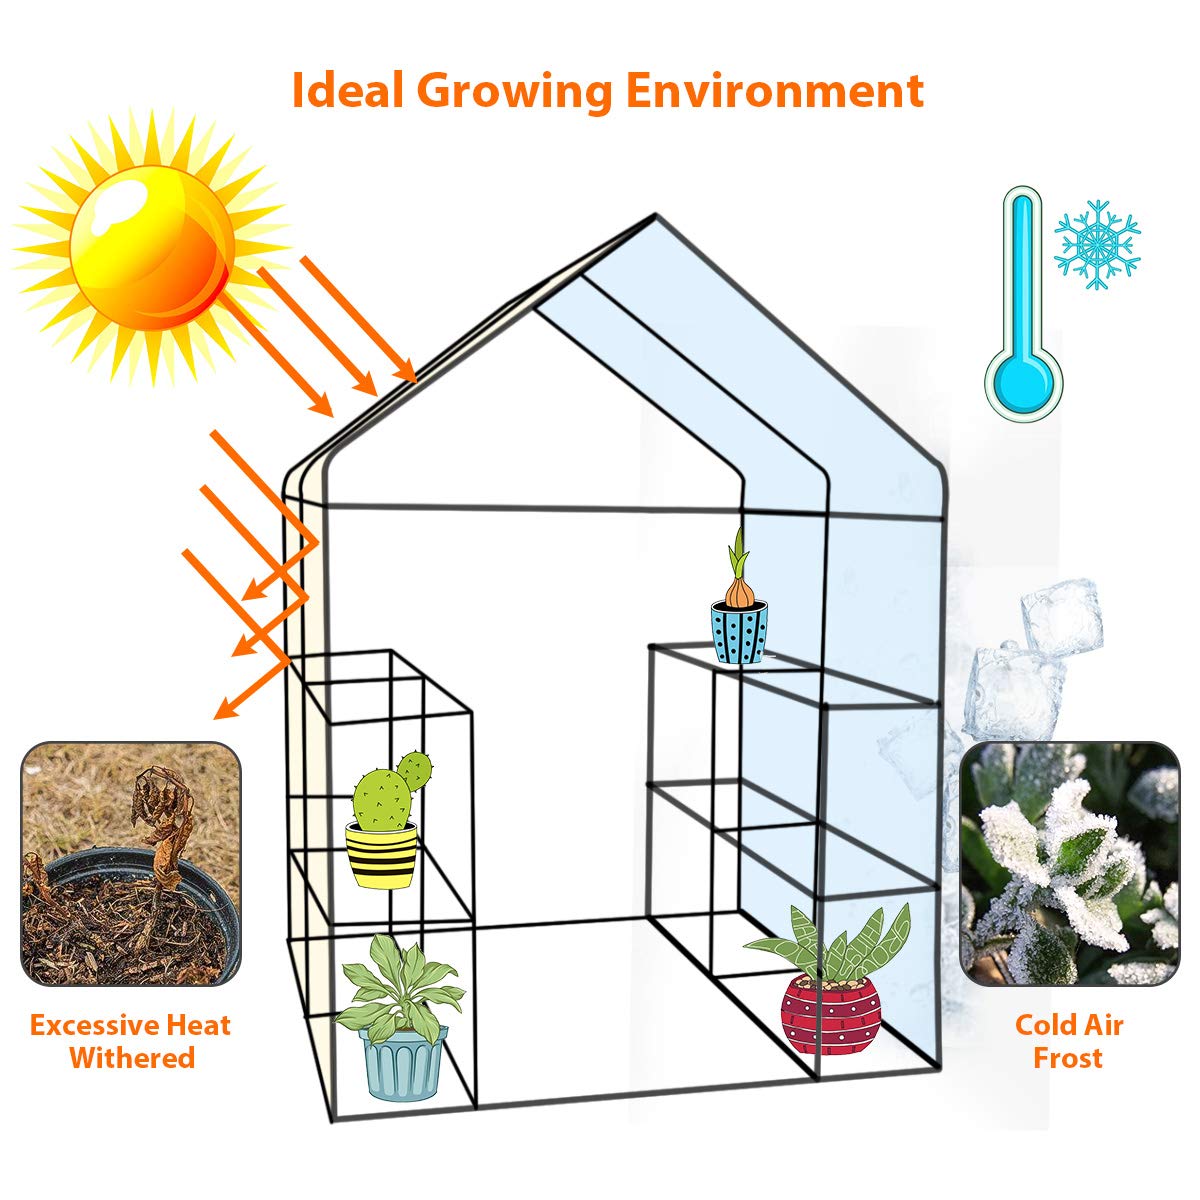
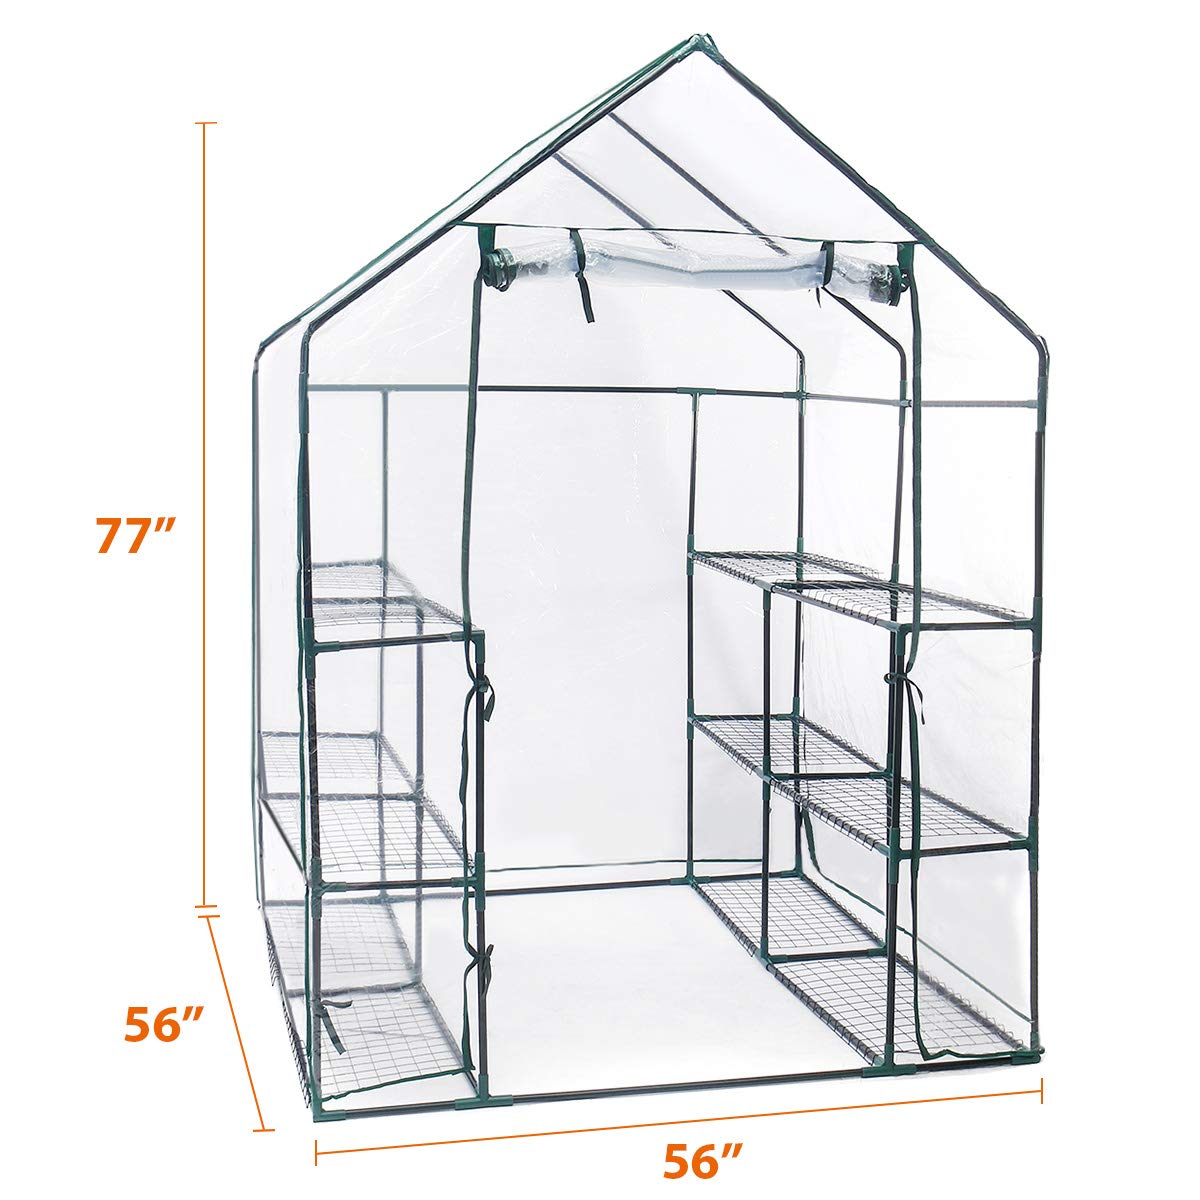

Specifications Material: PVC Cover and Iron Frame Color: Green and Transparent Size:L*W*H - 56 X 56 X 77 inches Weight: 21.6lbs Package Includes 1 x Greenhouse 1 x Instruction - It is recommended to place the heavier potted plant on the bottom. - Can be used with an LED grow light and a small fan, which can provide an ideal growing environment.
T**G
One of the best purchases I've made in a long time.
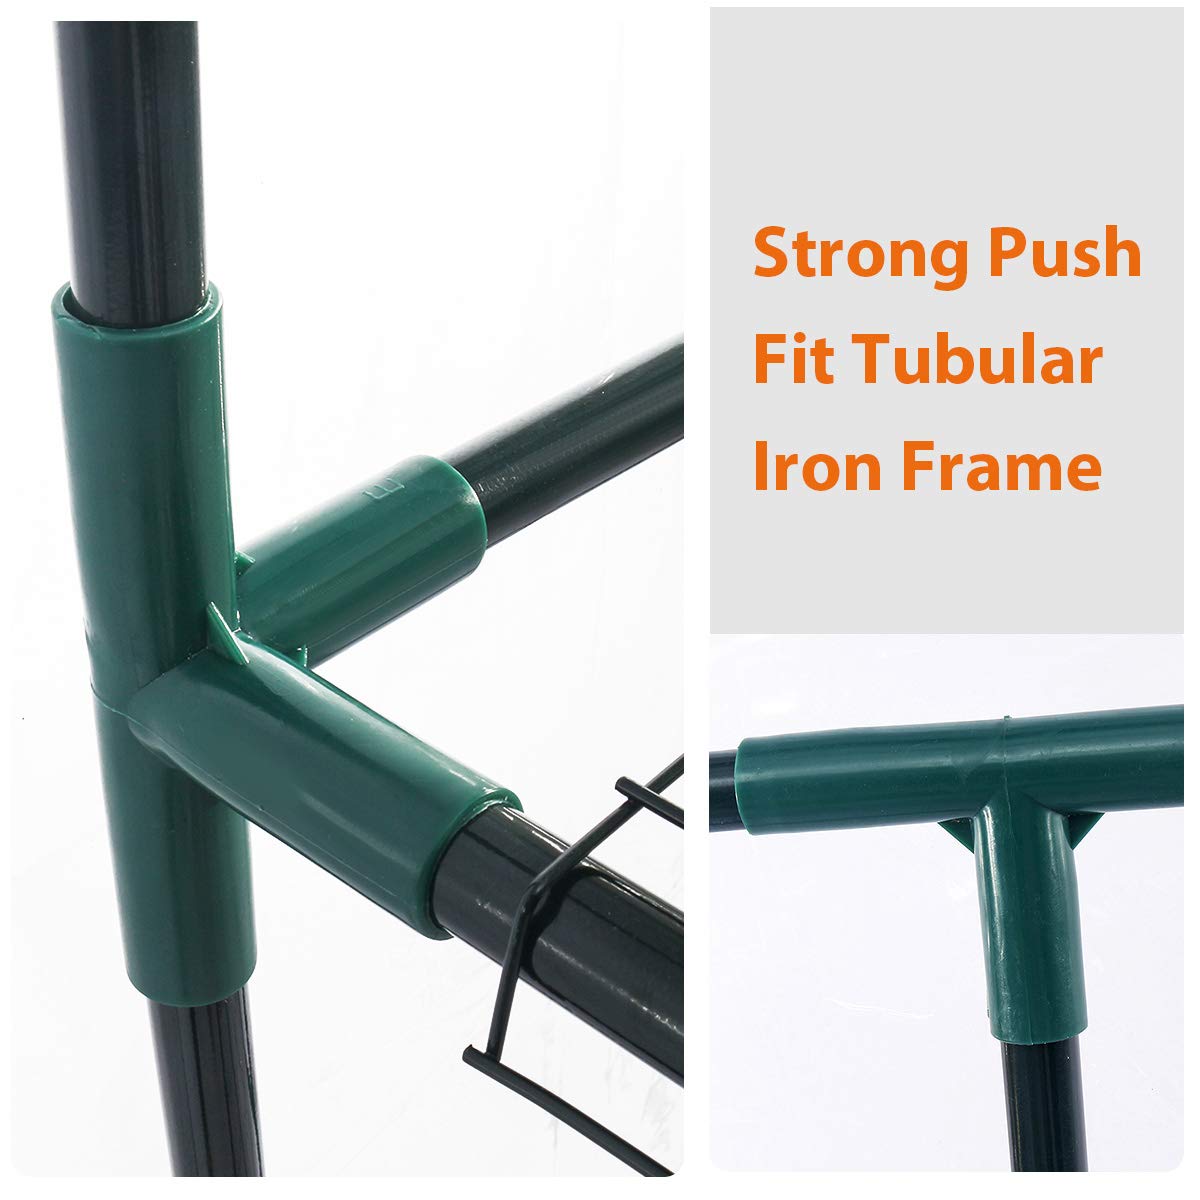
I bought two of these to go on my deck since we don't get much sunlight in our yard. My first impressions was "OMG, there's more parts than the space shuttle!", and "Only a diagram?... you've got to be kidding me." Let me assure you this is not only easy to put together, it's actually very fun to put together! If you enjoyed Tinker Toys as a child, this is exactly the same only much larger. The first one I put together took a lot longer but the second one went together in 45 minutes. After getting the first one built, I was surprised to see how big it was. This little greenhouse is sturdy but lightweight, very well thought out and engineered. This was one of the best purchases I've made in a long time.Improved Assembly Instructions:Take everything out of the box and sort it out, but don't start opening the inner packages yet until you've read the rest of THESE instructions. You have struts and you have connectors - simple. The struts are identified by NUMBERS; the connectors are identified by LETTER. Sort them by kind on a table nearby and allow yourself a flat, hard surface to work on if possible. I don't think putting this together in the yard would be very fun.Dump out the connectors and sort them out by kind. The connectors are marked with the letters. It is very important that you find and sort the two "C", the two "J", and the one "H" connector so you don't use them somewhere else; these are reserved for the last few steps. Look for the marking on these to make sure you set aside the right ones.It might be intimidating to look at the "big picture" on the diagram, so focus on sections, beginning at the bottom. I created a diagram for building each section; it will help to print it out. There are Left and Right sections - the same but mirrored images. Now, build the very bottom left section, according to my diagram "Floor". Note that the bottom is the Front. You'll make two of these, mirrored images.Next, make the 2nd tier, according to my diagram "2nd Tier". Make two of these, mirror images. Then make the "Top Tier", according to my diagram, making two of them, mirror images.Connect them together. Sticking the struts in one side of the connectors and fitting the other end after you have them all stuck in one hole, is the best method. Bang them down with your hand or rubber mallet (recommended) to insure a good, snug fit.Unzip the cover before trying to install over frame. Get it in place and tie the tie downs.Print out my "Improved Factory Diagram" and save it in case you need to dismantle it later.So, I've spent 4 hours on the diagram and adding the elements to the factory diagram, writing the instructions, and the review, so I hope you click the "helpful" button if it helped you. It's raining today and I don't have any planters ready to go in the greenhouses so I'll add photos later.
M**R
Economical, yet functional greenhouse to start gardening
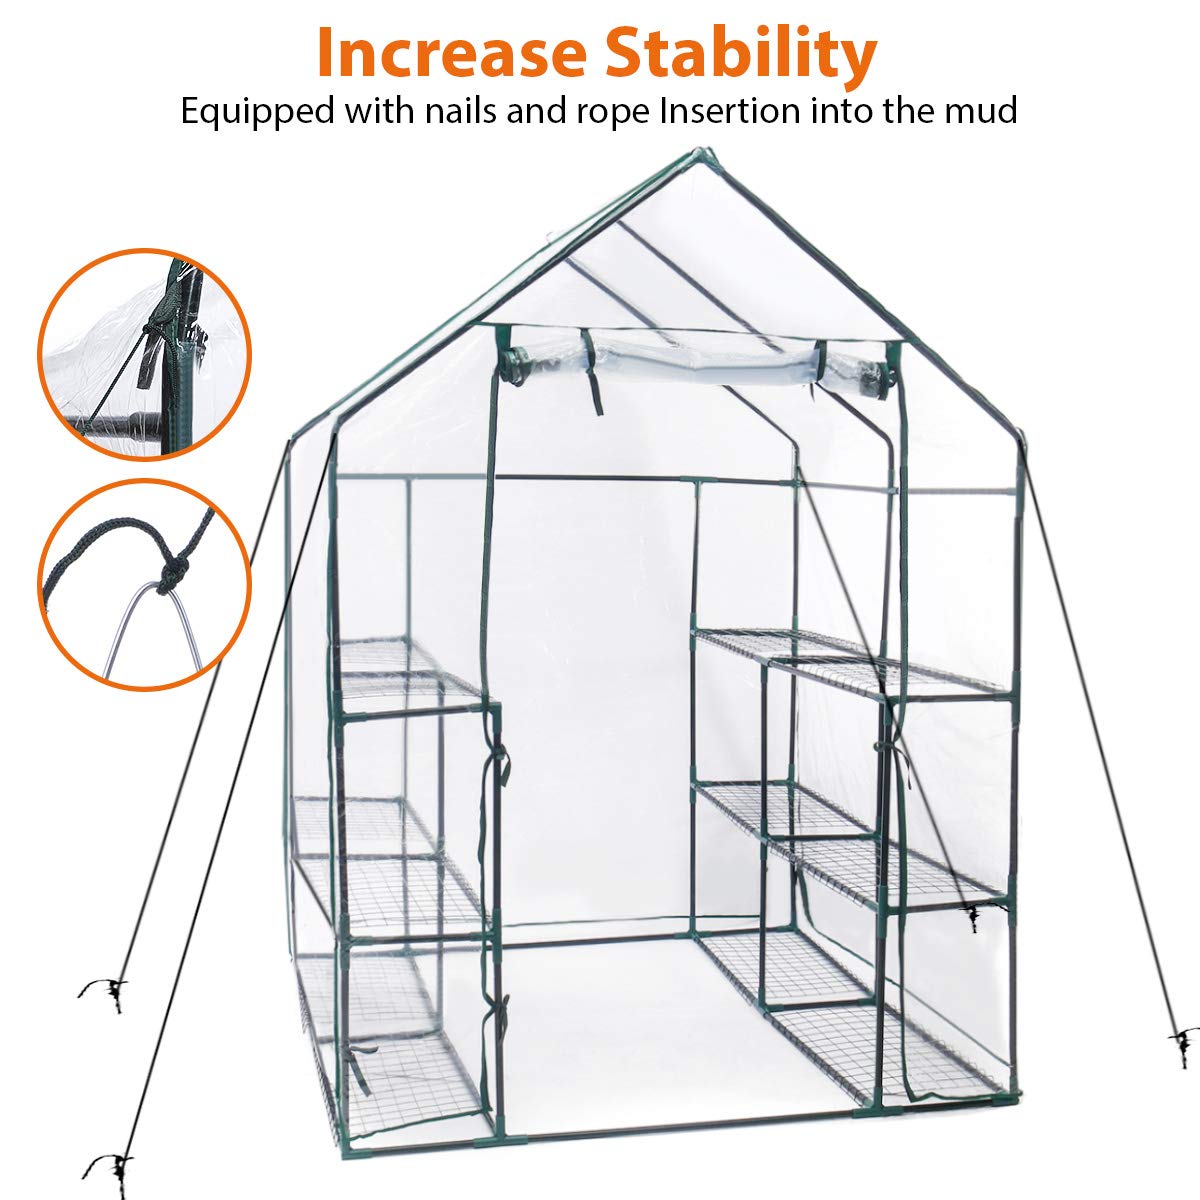
This greenhouse comes with lots of parts and pieces and there were no instructions included in the box. Luckily, my husband was up for a challenge. Simply by looking at the parts and using a diagram we saw posted from someone’s review photo, we treated this like a fun puzzle and were able to put this together in a little over an hour. In a way, we were glad that there were instructions missing because it gave us the opportunity to spend quality time together and have fun in the process. We learned that the pieces are all labeled with letters and although the connector pieces all look alike, they are not and differ in minor ways. At first we thought we had some missing parts and realized that we used the wrong parts in some areas, so we had to remove them and fix. At the end, we used all of the parts and the nice thing is this doesn’t require any tools to assemble which is convenient.The greenhouse cover has two (2) roll-up zippers on the front to open and close. It does get extremely hot in the greenhouse, so make sure that pets or even small children don’t get stuck in there because they could suffocate from heat exhaustion. It’s good that the cover is see-through so you can see at all times what or who is in the greenhouse. Make sure to keep this well-ventilated when someone is inside the greenhouse so that they are able to breathe easily. This greenhouse is pretty spacious and measures 56.3 x 56.3 x 76.8 inches. Each side has three (3) rows of wired shelves which fits trays nicely. There are twelve (12) wired shelves total and each can hold a max weight of eleven (11) pounds. There are also stakes and rope included fo tie down the four (4) corners so that the wind doesn’t pick it up or knock it down. We can’t wait to start our garden and hopefully our plants start sprouting soon!
M**
You will love this.
I never write reviews unless I’m really, really satisfied. This is a great little greenhouse and it holds so much more than you probably think it will. Much sturdier with plants inside, but great bang for the buck. Only downside is that the instructions were only a diagram, and it was difficult to see all the connecting pieces on it. We were left to try and figure it out. That said, there were only a couple of head-scratching moments before everything was done. Took about thirty minutes to complete. I am so in love with his little greenhouse. It’s very charming and seems to be just perfect thus far.
L**H
Cheap materials, super thin plastic covering, all around useless!
DO NOT BUY!!! This thing is useless! I gave 5 stars for it being lightweight. Lightweight is a understatement. This thing barely weighs 20 pounds. The directions are almost useless. It came apart when the wind blew 20 mph today. I even had it staked down with 3 different ropes to keep it in once place. Well it didn't move places instead the entire cover just ripped. I knew I had purchased a useless product when the plastic started ripping at the seams the first time I went to zip it shut. The cover barely fits so it creates tension points around all the corners and it just rips. The "metal" shelves are just thin wire that couldnt hold more than a couple pounds and half of them didnt even fit around the entirely plastic frame.
S**M
Perfect for houseplants
Last year in winters I lost all my house plants to the chilling weather. I decided to take care of the new plants from now itself.Since my apartment balcony is very small, I wanted something to help me organize the house plants and ensure all of them get decent amount of sunlight.This greenhouse can be arranged in different sizes as needed and helps me to arrange my plants as required. I haven't covered the greenhouse yet and will be doing it in winters. Since few of my plants are still growing I have assembled the green house on partially as per my need.Assembling the greenhouse is easy as all parts are labeled as per the manual. The quantity is also very good.
Trustpilot
2 months ago
1 day ago
